Soakaway Design & Installation: Rainwater Disposal
To install a soakaway, you need to carry out a percolation test to confirm the ground can absorb water, size the soakaway for the roof area and local rainfall, excavate and fill with soakaway crates or rubble, connect the incoming pipe from your surface-water drainage, and backfill. A soakaway is the preferred method of rainwater disposal under Building Regulations (Approved Document H), which requires you to infiltrate rainwater to the ground wherever ground conditions allow, before considering connection to a watercourse or sewer.
Soakaways are the silent workhorses of UK drainage. Thousands are installed every year on extensions, new builds, driveways, and garden landscaping projects. They take the rainwater your gutters collect and return it to the ground naturally, reducing the load on the public sewer network and helping to prevent surface-water flooding. Getting the design and installation right means the soakaway works invisibly for decades. Getting it wrong means standing water, waterlogged gardens, and a failed Building Control inspection.
What Is a Soakaway?
A soakaway is a below-ground structure that receives rainwater and allows it to percolate (soak) into the surrounding soil. It acts as temporary storage during heavy rain, gradually releasing water into the ground over hours or days.
Types
| Type | Construction | Cost | Capacity | Best For |
|---|---|---|---|---|
| Rubble-filled pit | Pit filled with clean rubble or gravel | Low | ~30% void ratio (30% of volume is usable storage) | Small garden projects, budget jobs |
| Soakaway crates | Modular plastic crates stacked in a pit, wrapped in geotextile | Medium | ~95% void ratio (much more efficient) | Most domestic installations |
| Concrete ring | Pre-cast concrete rings with perforated walls | Medium-high | ~100% internal volume | Larger installations, commercial |
Modern installations use soakaway crates because they provide roughly three times more storage per cubic metre than rubble — meaning a smaller excavation for the same capacity. They are also lighter, faster to install, and easier to wrap in geotextile. For any soakaway connected to an underground drainage system, crates are the practical choice.
Step 1: Percolation Test
Before designing a soakaway, you must confirm the ground can absorb water fast enough. The standard test (BRE Digest 365) is straightforward but essential — skip it and you risk installing a soakaway in ground that cannot drain.
The Test Procedure
- Dig a test pit 300 mm × 300 mm × 300 mm deep at the proposed soakaway location
- Fill with water to 300 mm depth and let it drain completely (saturating the ground)
- Immediately refill to 300 mm
- Time how long it takes for the water to drop from 75% full (225 mm) to 25% full (75 mm)
- This is the percolation time (Vp) in seconds
- Repeat the test three times and take the average — ground conditions vary and a single test may not be representative
Interpreting the Result
| Vp (seconds per 150mm drop) | Soil Type | Soakaway Suitable? |
|---|---|---|
| Under 15 | Very sandy/gravel | Yes — excellent drainage |
| 15–100 | Sand, loam, well-drained soil | Yes — standard soakaway works |
| 100–300 | Silty clay, moderate drainage | Marginal — larger soakaway needed |
| Over 300 | Heavy clay | No — soakaway will not work; use alternative disposal |
If the percolation test fails (Vp over 300 seconds), you cannot use a soakaway. Alternative disposal methods (watercourse, surface-water sewer, attenuation tank) must be considered. This is particularly common in areas with heavy London clay, Oxford clay, or Weald clay soils.
When to Test
- Before buying materials — there is no point purchasing soakaway crates if the ground will not drain
- At the proposed soakaway location — not 10 m away in a different soil pocket
- In winter or after wet weather — this gives you the worst-case percolation rate, which is exactly what the design needs to handle
Step 2: Size the Soakaway
The soakaway must be large enough to store the peak rainfall volume while the water drains into the ground. The calculation method is from BRE Digest 365:
Simplified Sizing
Required storage volume = Roof area (m²) × Rainfall depth (m) × Safety factor
For standard domestic work:
- Use a rainfall depth of 0.015 m (15 mm) — this represents a 10-minute storm at high intensity
- Safety factor: 1.5
| Roof Area | Storage Volume Required | Crate Soakaway Size (approx.) |
|---|---|---|
| 30 m² | 0.68 m³ | 1.0 × 1.0 × 0.8 m |
| 50 m² | 1.13 m³ | 1.2 × 1.2 × 0.8 m |
| 75 m² | 1.69 m³ | 1.5 × 1.5 × 0.8 m |
| 100 m² | 2.25 m³ | 1.5 × 1.5 × 1.0 m |
| 150 m² | 3.38 m³ | 2.0 × 2.0 × 0.8 m |
For a full BRE Digest 365 calculation (required for Building Control on larger projects), you need the site-specific percolation rate and the design storm data for your location. Our drainage calculator can help estimate sizing for standard domestic installations.
Step 3: Installation
Location Requirements
- Minimum 5 m from any building (to prevent undermining foundations)
- Minimum 2.5 m from any boundary
- Minimum 5 m from any road
- Below the water table is acceptable but reduces effectiveness during wet periods
- Not in made ground (filled ground) — compacted fill does not percolate reliably
- Away from trees — roots can block the soakaway over time
- Downhill from the building where possible — gravity is your friend
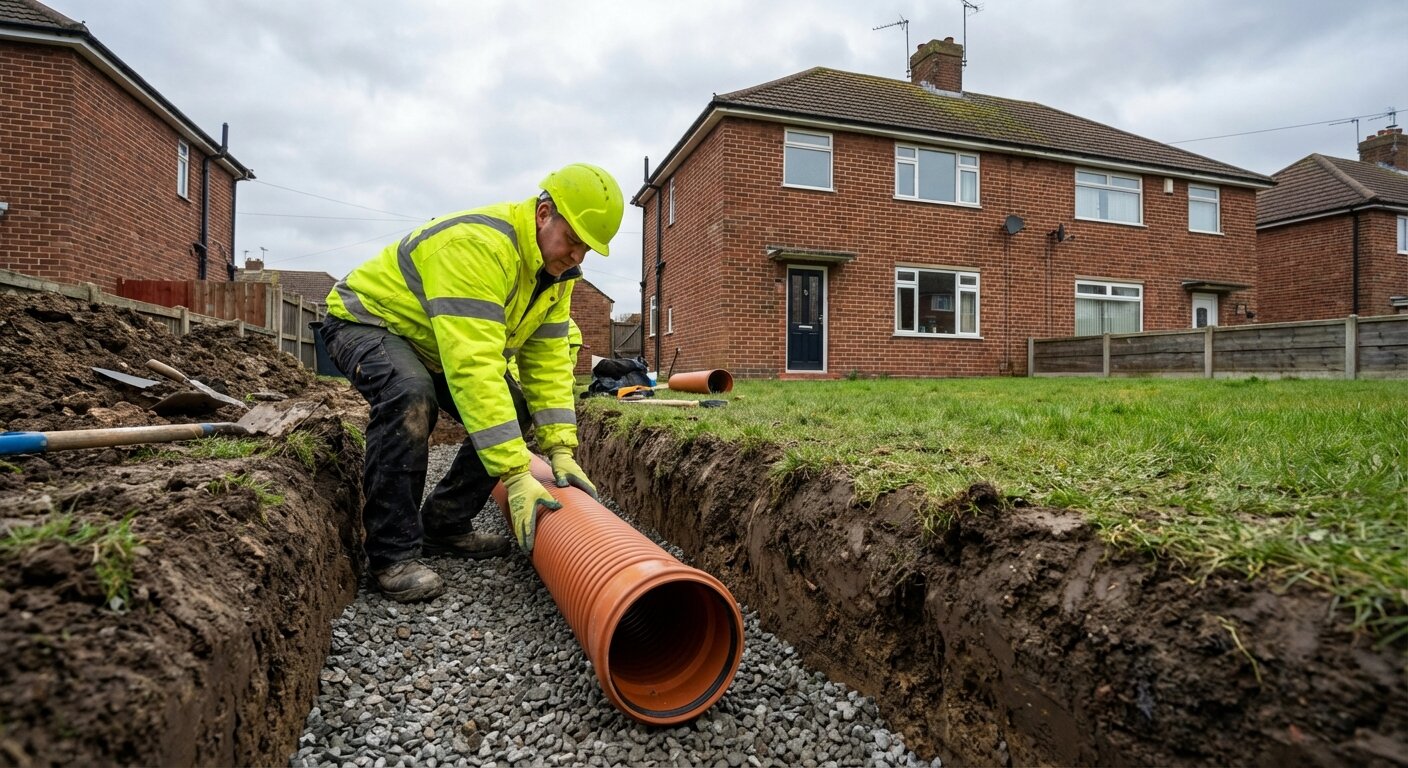
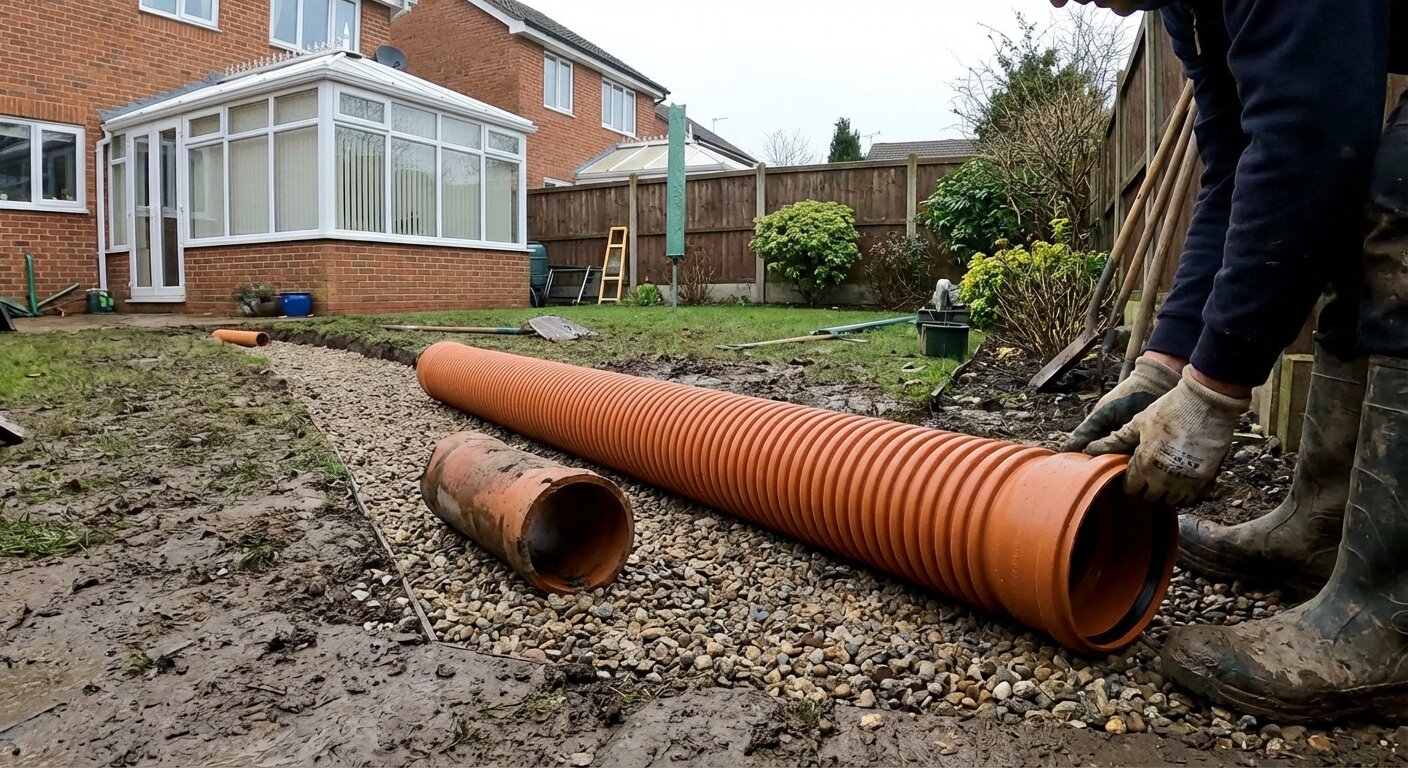
Construction (Crate Method)
- Excavate the pit to the required dimensions + 150 mm clearance on all sides
- Line the pit with geotextile membrane (wraps the crates to prevent soil silting the voids)
- Stack the crates in the pit according to the manufacturer’s instructions
- Connect the incoming pipe — the 110 mm surface-water pipe from the underground drainage system enters through the geotextile into the top crate
- Wrap the geotextile over the top of the crate stack, overlapping by at least 300 mm
- Backfill with excavated material, compacting in layers
Construction (Rubble Method)
- Excavate the pit (significantly larger than crate method for equivalent storage)
- Line with geotextile (optional but recommended to prevent soil migration)
- Fill with clean rubble — brick, stone, or gravel (not soil or mixed waste)
- Connect the incoming pipe — lay it to discharge into the centre of the rubble fill
- Cover with geotextile
- Backfill with at least 150 mm of topsoil
Common Installation Mistakes
1. Skipping the Percolation Test
Installing a soakaway in heavy clay because “the garden drains OK” is a recipe for failure. Gardens drain surface water across a wide area — a soakaway concentrates it in one spot. Always test.
2. Undersizing
A soakaway that is too small overflows during heavy rain, causing surface flooding. The BRE 365 calculation exists for a reason — use it.
3. Too Close to the Building
Placing a soakaway within 5 m of a building risks saturating the ground near the foundations. On clay soils, this can cause ground movement (heave) that damages the structure.
4. No Geotextile
Without geotextile wrapping, soil particles migrate into the soakaway voids over time, reducing capacity. Within 5–10 years, a crate soakaway without geotextile can lose significant storage volume.
5. Using Contaminated Fill
Rubble soakaways must use clean stone, brick, or gravel. Construction rubble containing plaster, timber, metal, or organic matter degrades over time, blocks voids, and can contaminate groundwater.
Building Regulations
Approved Document H — Rainwater Disposal Hierarchy
- Soakaway / infiltration — first choice if ground conditions allow
- Watercourse (stream, river)
- Surface-water sewer
- Combined sewer — last resort
Building Control will require evidence that higher-priority options have been considered before accepting a lower-priority method. For a soakaway, this means providing the percolation test results.
Building Control Inspection
For new soakaway installations associated with building work (extensions, new builds), Building Control will want to:
- See the percolation test results
- Confirm the soakaway size is adequate for the roof area
- Check the location (5 m from buildings, 2.5 m from boundaries)
- Inspect the construction before backfilling (sometimes)
- Confirm the incoming pipe is correctly connected and falls adequately
Maintaining a Soakaway
Soakaways are low-maintenance, but they are not zero-maintenance:
- Annually: Check that water is draining during heavy rain — standing water around the soakaway location suggests a problem
- Every 2–3 years: Clear any silt or debris from the incoming pipe and any upstream silt traps
- Gutters: Keep your guttering clear of leaves and debris — everything that enters the gutter eventually reaches the soakaway
- Trees: Monitor nearby tree growth — root intrusion can block the soakaway over time
- If the soakaway fails: Symptoms include slow drainage, standing water, and waterlogged garden. The usual causes are silting (geotextile failure), root intrusion, or the soil’s permeability reducing over time. Replacement is usually necessary.
Frequently Asked Questions
How to install a soakaway?
Carry out a percolation test, size the soakaway for your roof area, excavate the pit at least 5 m from any building, line with geotextile, fill with soakaway crates or clean rubble, connect the surface-water pipe, wrap with geotextile, and backfill. Notify Building Control if the work is part of a building project.
How big should a soakaway be?
Size depends on the roof area draining to it and the soil’s percolation rate. As a rough guide, a 50 m² roof needs approximately 1.1 m³ of storage (a crate soakaway about 1.2 × 1.2 × 0.8 m). Use BRE Digest 365 for a precise calculation.
Will a soakaway work in clay soil?
Unlikely. Heavy clay has very poor permeability (percolation times over 300 seconds). If the percolation test fails, you cannot use a soakaway and must find an alternative — typically connection to a surface-water sewer or watercourse. Some clay soils have pockets of better drainage — always test on-site before ruling it out.
How far from the house should a soakaway be?
A minimum of 5 metres from any building, to prevent water undermining the foundations. Also at least 2.5 m from any boundary and 5 m from any road. If space is limited, speak to Building Control about alternatives.
Do I need a percolation test?
Yes, for any new soakaway associated with building work. Building Control will ask for the test results as part of the drainage approval. Even for standalone projects (driveway drainage, garden soakaway), testing is strongly recommended to ensure the soakaway will actually work.
Can I connect a driveway to a soakaway?
Yes, provided the soakaway is sized for the driveway area as well as any roof areas already draining to it. Driveway surface water should pass through a silt trap before entering the soakaway to prevent sediment blocking the crate voids. See our guide on driveway drainage solutions for more detail.