Underground Drainage Installation: Complete Guide
To install underground drainage, you need to excavate a trench at the correct gradient (typically 1:40 for 110 mm foul drains), lay a granular bed, place the pipes with ring-seal joints, backfill with pea gravel surround, connect to the building’s soil stack or gullies, install inspection chambers at changes of direction, and connect to the public sewer or soakaway. The process is straightforward in principle but requires precision — particularly the gradient, which must be consistent to achieve self-cleansing flow. Building Control will inspect the installation before backfilling, so coordination with your local authority is essential.
Underground drainage is one of those jobs where getting it right the first time matters enormously. Once the trench is backfilled and the patio, driveway, or landscaping goes over the top, remedial work means digging it all up again. Taking the time to plan the layout, calculate the gradient, and install properly saves significant money and disruption.
Planning the Layout
What You Need to Know Before You Start
- Where the public sewer is — your drain must connect to it (or to a septic tank / cesspit in areas without mains drainage)
- The invert level of the sewer — how deep is the connection point?
- The distance from the building to the connection — this determines the total pipe run
- The gradient — the pipe must fall at the correct rate from building to sewer
- Changes of direction — each change needs an inspection chamber or access point
- Obstructions — trees, other services (gas, water, electric), hard surfaces, structures
Pre-Start Checks
- ☐ Building Control notified (if the work requires approval)
- ☐ Water company consulted (for sewer connection — you may need a Section 106 agreement)
- ☐ Service search completed (cable, gas, water routes identified)
- ☐ Trial hole dug to confirm sewer depth
- ☐ Materials ordered
Tools and Equipment
| Tool | Purpose |
|---|---|
| Mini excavator (recommended) or spades | Digging the trench |
| Laser level or dumpy level | Setting the gradient accurately |
| Spirit level on a straight edge | Checking gradient in sections |
| String line and pins | Guide for trench alignment |
| Tape measure (30 m) | Measuring pipe runs |
| Fine-toothed hacksaw | Cutting PVC-U pipe |
| File or deburrer | Smoothing cut ends |
| Lubricant (silicone-based) | Easing ring-seal joints |
| Wheelbarrow and compactor | Moving and compacting bedding material |
Step 1: Excavate the Trench
Trench Dimensions
| Parameter | Minimum | Recommended |
|---|---|---|
| Width | Pipe diameter + 300 mm | 450 mm for 110 mm pipe; 600 mm for 160 mm |
| Depth (under garden/soft area) | 600 mm cover to pipe crown | 600–900 mm |
| Depth (under driveway) | 600 mm cover (SN4 pipe) or 300 mm (SN8 pipe) | 600 mm minimum |
| Depth (under road) | 1,200 mm cover minimum | Project-specific |
Gradient
Set the trench bottom at the correct gradient from building to sewer:
| Pipe Size | Recommended Gradient | Fall Per Metre | Fall Per 10m Run |
|---|---|---|---|
| 110 mm (foul) | 1:40 | 25 mm | 250 mm |
| 110 mm (surface) | 1:60 to 1:100 | 10–17 mm | 100–170 mm |
| 160 mm | 1:60 to 1:80 | 12.5–17 mm | 125–170 mm |
Use a laser level or dumpy level to set the gradient from the building end (high point) to the sewer connection (low point). Mark the gradient on profile boards or stakes at each end of the trench.
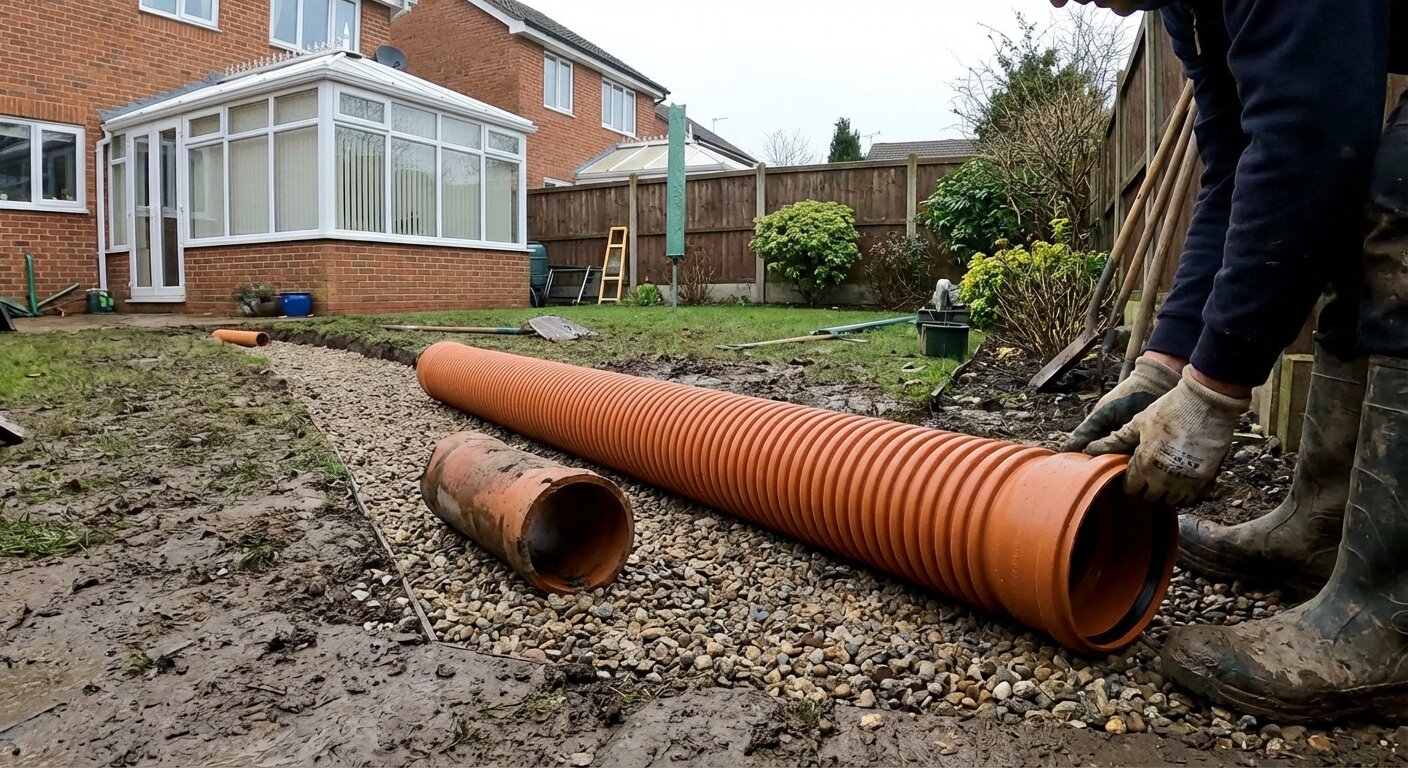
Step 2: Lay the Pipe Bed
Why Bedding Matters
The pipe must rest on a consistent, firm bed along its entire length. Resting on hard lumps, rocks, or uneven ground creates point loads that can crack the pipe under backfill pressure.
Bedding Classes (BS EN 1610)
| Class | Material | Compaction | Use |
|---|---|---|---|
| Class S | Concrete surround | Full encasement | Under roads, heavy loads |
| Class B | Selected granular (pea gravel) | Full surround to 150 mm above crown | Standard domestic, garden, driveways |
| Class N | Natural trench bottom (if suitable) | Minimal | Only where trench bottom is uniform fine material |
For most domestic work, Class B bedding is standard:
- Spread 100 mm of pea gravel (10 mm) or fine aggregate on the trench bottom
- Level and compact lightly
- This forms the bed the pipe sits on
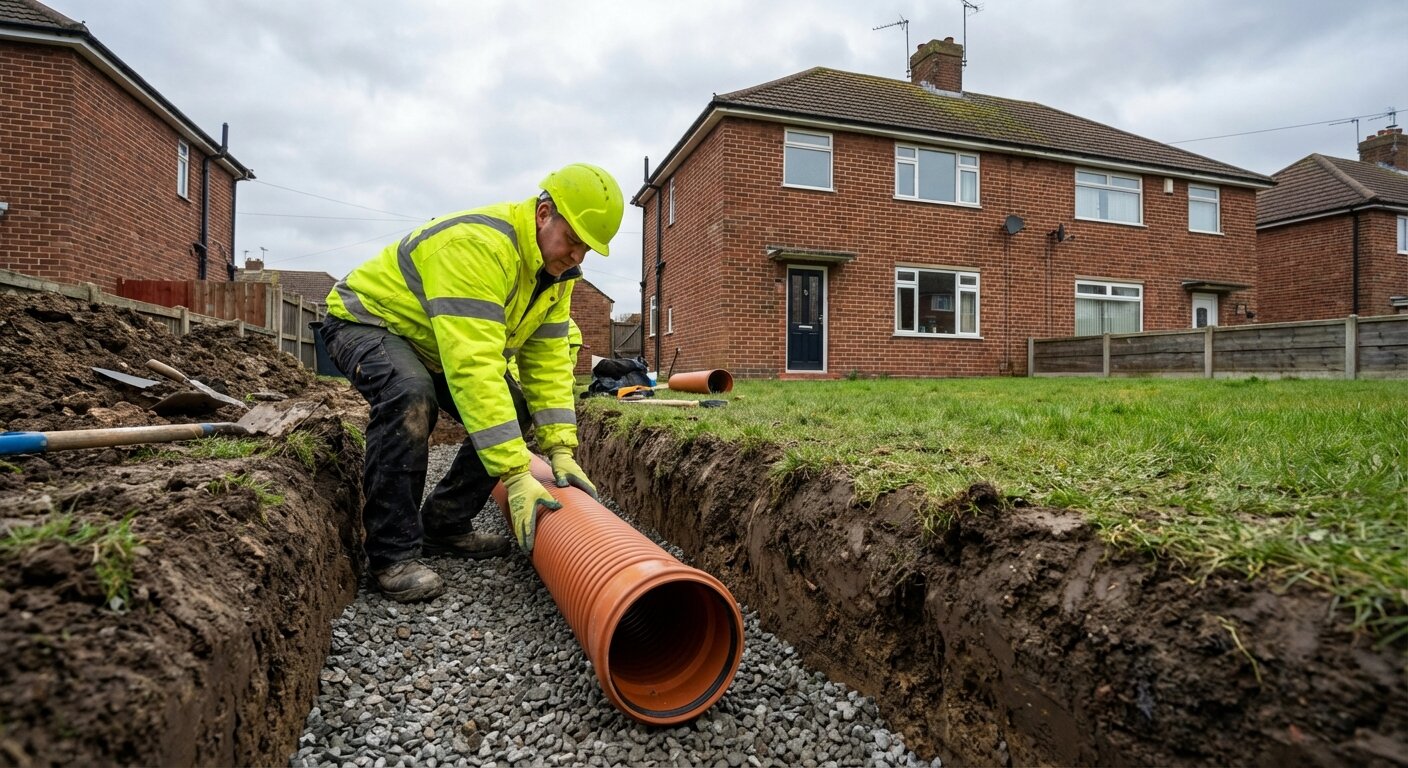
Step 3: Lay the Pipe
Starting Point
Start laying from the lowest point (the sewer connection) and work uphill toward the building. This ensures each joint’s socket faces uphill, and any slight misalignment does not create a reverse trap.
Making Joints
PVC-U underground drainage pipe uses ring-seal push-fit joints:
- Clean the spigot (plain end) and the socket (bell end)
- Check the rubber seal is correctly seated in the socket
- Apply silicone lubricant to the spigot end
- Push the spigot into the socket until it reaches the insertion mark (moulded line on the pipe)
- The gap between the insertion mark and the socket allows for thermal expansion
- Check the joint is straight — misalignment causes stress and leaks
Checking Gradient
After laying each section (2–3 pipes), check the gradient:
- Laser level: Sight along the pipe from the level to the reference mark at the far end
- Spirit level on a straight edge: Lay a 1.2 m straight edge along the top of the pipe with a spirit level. For 1:40 gradient, a 1.2 m straight edge should show 30 mm of fall
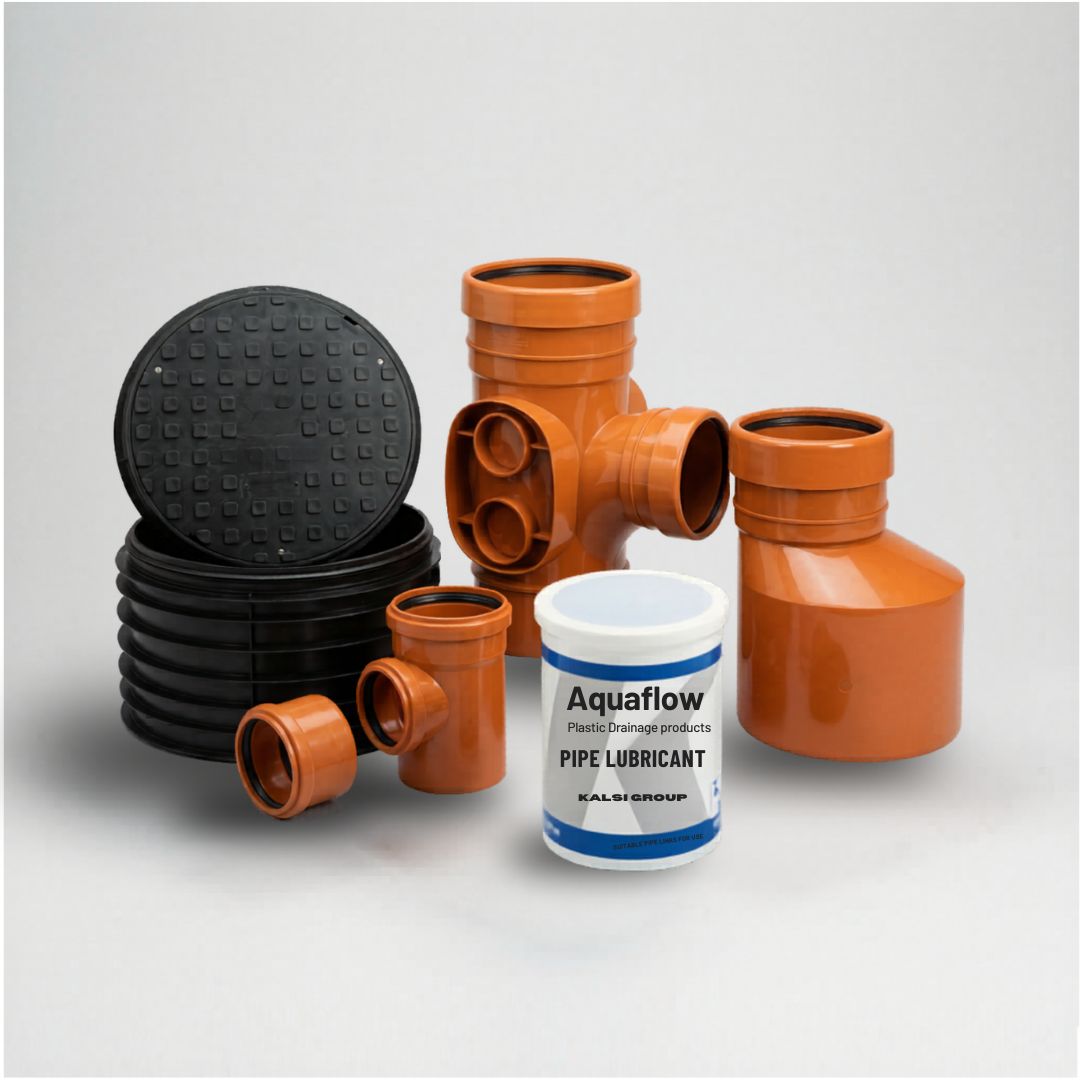
Kalsi’s 110 mm system provides all the pipe lengths and fittings needed for standard domestic runs.
Step 4: Install Inspection Chambers
Building Regulations require access points (inspection chambers or manholes) at:
- Every change of direction
- Every junction where branches connect
- Every significant change of gradient
- At intervals not exceeding 45 m on straight runs
- At the head of each drain run (nearest the building)
Inspection Chamber Specification
| Type | Use |
|---|---|
| Mini access chamber (shallow) | Straight runs, depths up to 600 mm |
| Inspection chamber | Changes of direction, junctions, depths up to 1,000 mm |
| Manhole | Depths over 1,000 mm, complex junctions |
Kalsi’s inspection chambers are available in standard sizes with pre-formed channels and benching.
Installation
- Excavate a wider section of trench at the inspection chamber location
- Set the chamber base at the correct invert level
- Connect incoming and outgoing pipes to the chamber
- Build up the chamber shaft with riser sections to ground level
- Fit the cover and frame (duty rated for the expected loading — light duty for garden, heavy duty for driveway)
Step 5: Backfill
Surround
After the pipe is laid and inspected:
- Haunch the pipe — shovel pea gravel around the sides of the pipe to at least half its height
- Cover to 150 mm above the crown with pea gravel or selected fill
- Compact gently — do not compact directly over the pipe with heavy machinery
Final Backfill
Above the granular surround:
- Backfill with excavated material (free from large stones, rocks, or debris)
- Compact in 150–200 mm layers
- Fit marker tape (yellow for gas, blue for water — drainage typically does not require tape but good practice to use a marker strip showing “DRAIN BELOW”)
Step 6: Test
Building Control will typically want to inspect the drainage before final backfill. The standard test is:
Water Test
- Plug the lower end of the drain
- Fill the pipe with water to 1.5 m head above the invert at the upper end
- Allow 2 hours for absorption (new pipe stabilising)
- Top up to the test mark
- Observe for 30 minutes — the water level should not drop by more than 6.4 mm (for 110 mm pipe) per metre of pipe per 30 minutes
Air Test (Alternative)
- Plug both ends
- Pressurise to 100 mm water gauge (using a hand pump and manometer)
- The pressure should not fall to less than 75 mm water gauge within 5 minutes
Step 7: Connect to the Building
Foul Drainage Connection
The underground drain connects to the building’s soil stack via a rest bend at the base of the stack. The rest bend transitions from the vertical soil pipe to the horizontal underground run.
Surface Water Connection
Rainwater downpipes connect to the underground surface-water drain via:
- Back-inlet gully — a trapped gulley that prevents sewer gases entering the open air
- Rainwater adaptor — direct connection to the underground pipe (not trapped, as there is no foul-gas risk)
Common Mistakes
| Mistake | Consequence |
|---|---|
| Inconsistent gradient | Pooling, slow flow, blockages |
| No bedding or inadequate bedding | Pipe cracks under load |
| Sharp bends without access | Blockages with no way to rod |
| Too-shallow cover | Pipe damage from surface loads |
| Not testing before backfilling | Leaks discovered only after paving is complete |
| Connecting surface water to foul sewer | Illegal in most situations; sewer surcharge risk |
Frequently Asked Questions
How to install underground drainage?
Excavate a trench at the correct gradient (1:40 for 110 mm foul), lay a granular bed, place pipes with ring-seal joints, install inspection chambers at every change of direction, backfill with pea gravel surround, test the system (water or air test), and connect to the building and the public sewer or soakaway.
What gradient does a drain pipe need?
For 110 mm foul drains, a gradient of 1:40 (25 mm fall per metre) is recommended. The minimum is 1:80. For surface-water drains, 1:60 to 1:100 is acceptable. For 160 mm pipes, 1:60 to 1:80 is standard. The gradient must achieve self-cleansing velocity (0.7 m/s minimum).
Do I need Building Control for drainage?
Yes, for new drainage installations, alterations to existing drainage, and connections to public sewers. Notify Building Control before starting work. They will inspect the excavated trench and pipe layout before you backfill. Failure to notify can cause problems when selling the property.
How deep should drainage pipes be?
Minimum 600 mm cover (from ground surface to the top of the pipe) under gardens and soft areas. Under driveways, 600 mm minimum with SN4 pipe or 300 mm with SN8 pipe. Under roads, 1,200 mm minimum. Greater depth may be needed to achieve the correct gradient to the sewer.
Can I install drainage myself?
The physical work is within DIY capability for competent homeowners, but the design, gradient calculation, and Building Control process require knowledge. Many homeowners hire a groundworker for the excavation and pipe laying while managing the project themselves. Always notify Building Control and have the work inspected before backfilling.