Ceiling Panels: Yes, You Can Panel Your Ceiling Too
Yes, you can put PVC panels on a bathroom ceiling — and it is one of the best ceiling finishes for bathrooms because PVC is completely waterproof, never needs painting, and will not crack, peel, or develop mould the way painted plaster and artex ceilings do. PVC ceiling panels install directly onto the existing ceiling with adhesive, screws, or a lightweight batten framework, and the result is a clean, bright, moisture-proof ceiling that stays looking fresh for 15–20 years without maintenance.
Bathroom ceilings are the forgotten surface. Homeowners spend time and money on tiles, panels, paint, and fixtures for the walls and floor, then leave the ceiling as standard painted plaster. Within a few years, that painted ceiling shows the results of daily steam exposure: peeling paint, yellowing, damp patches, and mould growth in the corners. PVC ceiling panels solve all of these problems permanently.
Why Bathroom Ceilings Fail
The Problem with Painted Plaster
A standard plaster ceiling with emulsion paint is fine in a bedroom or living room, but in a bathroom it faces:
- Daily steam exposure: Every shower sends a cloud of warm, moist air to the ceiling. Condensation forms on the cold ceiling surface.
- Moisture absorption: Emulsion paint is not waterproof. Repeated condensation soaks into the paint and plaster.
- Paint failure: Damp paint loses adhesion and peels. Gloss paint resists moisture better but yellows and cracks over time.
- Mould growth: Damp plaster + warm bathroom + poor ventilation = mould. The ceiling corners and areas directly above the shower are the worst affected.
- Artex degradation: Textured artex ceilings trap condensation in the texture, making mould even harder to treat. Pre-1985 artex may also contain asbestos.
The PVC Solution
PVC ceiling panels are completely impermeable. Condensation forms on the panel surface (as it would on any ceiling) but cannot soak in. It runs off or evaporates. The panel never peels, cracks, or provides a substrate for mould growth.
PVC Ceiling Panels vs Other Ceiling Finishes
| Feature | PVC Panels | Painted Plaster | Moisture-Resistant Plasterboard | Tongue-and-Groove Timber |
|---|---|---|---|---|
| Waterproof | Yes (100%) | No | Partially | No (needs sealing) |
| Maintenance | None | Repaint every 2–5 years | Repaint every 3–5 years | Re-seal/re-paint regularly |
| Mould resistance | Excellent | Poor | Moderate | Poor (absorbs moisture) |
| Installation time | 2–4 hours | 4–8 hours (plastering + painting) | 4–8 hours | 4–8 hours |
| DIY-friendly | Yes | Moderate | Moderate | Yes |
| Lifespan | 15–20 years | 2–5 years before repaint | 3–5 years before repaint | 5–10 years before re-treatment |
| Cost (materials) | £50–150 | £20–40 | £40–80 | £80–200 |
| Appearance | Clean, modern, uniform | Depends on painting quality | Depends on painting quality | Warm, traditional |
How to Install Ceiling Panels
Method 1: Direct Fix to Existing Ceiling
The simplest method — suitable when the existing ceiling is flat, sound, and level:
- Prepare the ceiling: Remove any flaking paint or loose material. The surface should be clean and dry.
- Fit edge trims: Install coving or edge trims around the perimeter. These create channels that receive the panel edges and provide a neat finish at the wall junction.
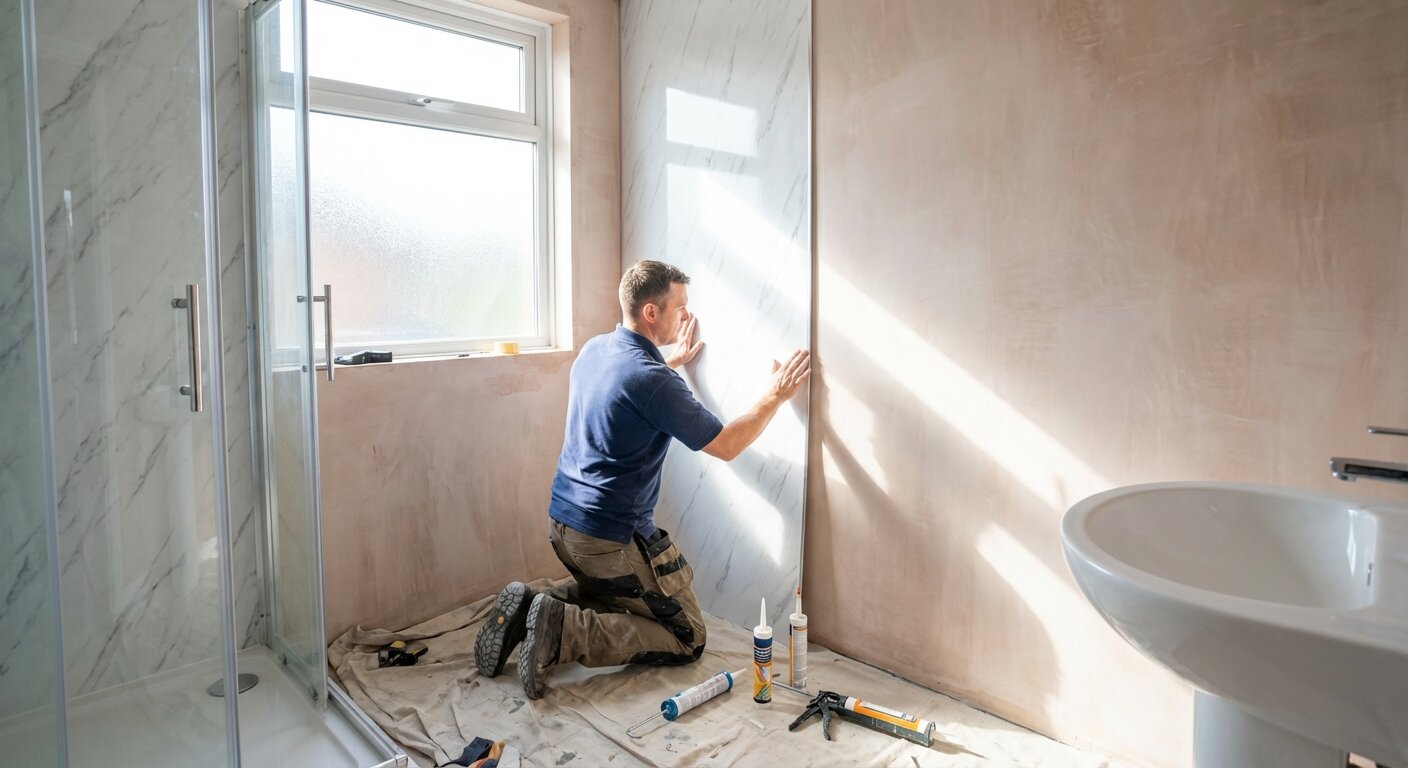
- Apply adhesive: Apply panel adhesive in beads or dots to the back of the first panel.
- Position and press: Slide the first panel into the edge trim and press firmly against the ceiling. Hold for 30–60 seconds while the adhesive grabs.
- Interlock panels: Slide the second panel’s groove over the first panel’s tongue and press into position.
- Continue across: Work across the ceiling, interlocking panels and pressing each one firmly.
- Cut the last panel: Measure the remaining gap, cut the last panel to width, and slide into position.
Tip: Use temporary props (a length of timber wedged between the floor and the panel) to hold panels in position while the adhesive sets. This is the biggest practical challenge of ceiling panels — gravity works against you.
Method 2: Batten Framework
For uneven ceilings, artex ceilings, or where you want to conceal existing damage:
- Fix battens: Screw timber battens (25 × 50 mm) to the existing ceiling at 400–600 mm centres, perpendicular to the direction the panels will run. Use a spirit level to create a flat, level framework.
- Install edge trims: Fix to the wall where it meets the batten framework.
- Screw or staple panels: Fix the first panel through its tongue edge into the batten using stainless steel staples or screws.
- Interlock and fix: Each subsequent panel slides over the previous tongue and is fixed through its own tongue edge.
- Continue across the ceiling.
The batten method is preferred because:
- It creates a flat surface regardless of the existing ceiling condition
- Panels are mechanically fixed (not relying on adhesive to fight gravity)
- It creates a void that can house new downlights, extractor fan ducting, or cables
- Panels can be removed and replaced individually
Incorporating Lighting
One of the biggest advantages of panel ceilings is the ease of adding recessed downlights:
With Battens (Recommended)
The void between the old ceiling and the panel surface provides space for LED downlight housings and wiring. Cut holes in the panels using a hole saw (matching the downlight size), feed the wiring through, and clip the downlights into place after the panels are fitted.
Without Battens
If panels are adhesive-fixed directly to the ceiling, there is no void for recessed lights. Use surface-mounted LED fixtures or pendant lights instead.
Electrical safety: All bathroom electrical work must comply with Part P of the Building Regulations. In zones 1 and 2 (above and around the bath or shower), lights must be IP-rated for the zone. Electrical connections in a bathroom should be carried out by a qualified electrician or a competent person registered with a Part P scheme.
Ventilation
A panel ceiling is airtight — unlike plaster, which allows some moisture to breathe through. This means adequate bathroom ventilation is even more important:
- Extractor fan: Required in any bathroom without an openable window (Building Regulations). Even with a window, a fan significantly reduces condensation
- Fan through panels: The extractor fan or ducting can pass through a panel ceiling. Cut a hole to match the fan housing, as you would for a downlight
- Trickle ventilation: Ensure the bathroom door has ventilation (undercut or trickle vent) to allow air circulation even when the door is closed
Without adequate ventilation, condensation will form on the panel ceiling surface. The panels will not be damaged (PVC is waterproof), but persistent condensation and poor ventilation creates conditions for mould growth on the ceiling surface, which needs wiping down.
Design Considerations
Colour
- White or light colours are standard for ceilings and make the room feel taller and brighter
- Matching the wall panels creates a seamless, clean look (particularly effective in shower rooms and wet rooms)
- Contrasting (e.g., dark wall panels with a white ceiling) maintains the sense of height
Finish
- Gloss reflects light and makes the ceiling appear higher — the most popular choice for bathrooms
- Matt reduces glare from downlights but does not have the light-enhancing effect of gloss
Panel Width
Ceiling panels are available in various widths. Narrower panels (100–150 mm) create a tongue-and-groove timber effect. Wider panels (250–400 mm) create a smoother, more modern appearance with fewer visible joints.
Frequently Asked Questions
Can you put PVC panels on a ceiling?
Yes. PVC ceiling panels install with adhesive or screws onto the existing ceiling (or a batten framework). They are waterproof, never need painting, resist mould, and give a clean, modern finish. They are one of the best ceiling options for bathrooms.
Do ceiling panels make a bathroom look smaller?
A batten-mounted panel ceiling drops the ceiling height by 30–50 mm. In a standard-height room (2,400 mm), this is barely noticeable. Using white or light-coloured gloss panels actually enhances the sense of space by reflecting light.
How do you fit downlights in panel ceilings?
Install panels on a batten framework to create a void for the downlight housings and wiring. Cut holes in the panels using a hole saw, feed wiring through, and clip the downlights in after the panels are fitted. All electrical work must comply with Part P Building Regulations.
Do PVC ceiling panels go mouldy?
The panels themselves do not — PVC is non-porous and mould cannot grow on the material. Surface condensation can develop mould if ventilation is poor, but this wipes off easily. Ensure adequate bathroom ventilation (extractor fan or openable window).
Can one person install ceiling panels?
Yes, though it is easier with two people. The challenge is holding panels against the ceiling while adhesive sets. Temporary props (timber wedged from the floor) or the batten-and-screw method (panels are mechanically fixed, no waiting for adhesive) make solo installation practical.
Related Kalsi Products
- Wall Panelling Range — matching wall and ceiling panels
- Smooth Panels — clean finishes ideal for ceilings
- Colour Range — whites, light colours and matching options
- Installation Guides — detailed fitting instructions
- Wall Panelling Calculator — calculate quantities for walls and ceilings